Metallographic Analysis: Steps for Consistent Results
The mechanical performance of any metal is defined by its microstructure. Metallographic analysis allows engineers to examine these internal features through a systematic workflow of sectioning, mounting, grinding, polishing, and etching.
Whether you are verifying alloy grades or conducting failure analysis, the clarity of your results depends entirely on the quality of your sample preparation. This guide covers the essential techniques and standard procedures needed to produce defect-free specimens that meet rigorous industry specifications.
Key Takeaways:
- Precision Sectioning: The quality of your final analysis depends heavily on the initial cut. Using the correct abrasive wheel and sufficient coolant prevents thermal burns that alter the microstructure.
- Systematic Grinding: You must remove all deformation from the previous step before moving to a finer grit. skipping steps or rushing this phase leaves deep scratches that reappear later.
- Cleanliness is Mandatory: Cross-contamination is the leading cause of polishing defects. thoroughly wash specimens and holders between every abrasive stage to avoid dragging coarse particles onto fine cloths.
- Standardization: Adhering to standards like ASTM E3 ensures your data is reproducible. Using automated equipment helps maintain this consistency better than manual preparation.
- Edge Protection: For samples requiring surface analysis, selecting the right mounting resin is crucial to prevent rounding and ensure the edges remain flat for the microscope.
What’s Metallographic Analysis? Why It Matters?
Metallography involves examining the structure of metals and alloys, often under a microscope, to understand the material’s properties and predict its behavior. The analysis often starts with surface preparation, where the specimen is carefully ground, polished, and etched to reveal its microstructure.
Why is it important across industries? Because understanding the fine details of metal microstructures helps you judge a material’s quality, durability, and reliability. With metallographic testing, you can accurately measure factors like hardness, grain size, and internal structure.
This testing process supports your decision-making when selecting materials for applications that demand high performance.
The Importance of Reliable Metallographic Testing
Materials science relies on precision, and that’s exactly what metallographic analysis provides. Metallographic testing allows you to determine if a metal is built for the job. Engineers use it as a guide, trusting its results to keep quality high and consistency solid.
Whether your focus is research or quality control, this testing process uncovers hidden qualities that influence a material’s performance over time. When it’s done right, metallographic analysis ensures accurate and reliable outcomes that benefit production and application.
Key Steps in Metallographic Sample Preparation
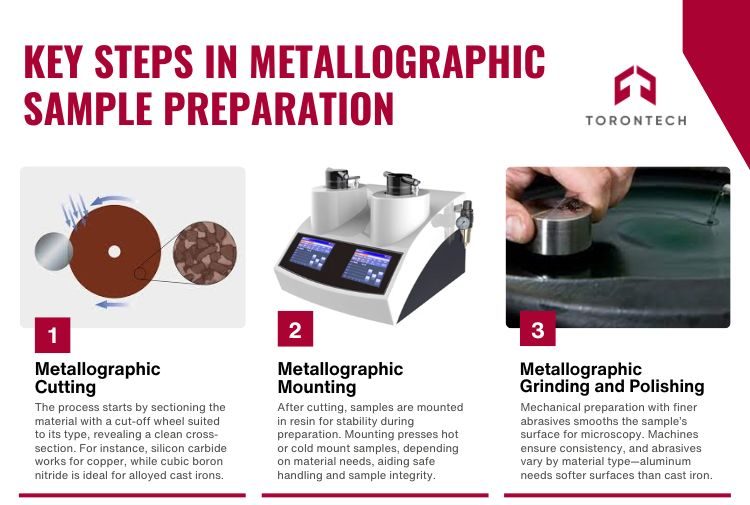
Proper sample preparation is essential for accurate analysis. This process includes several main steps:
1. Metallographic Cutting
The process begins by sectioning the material, often using a specialized metallographic cutting machine with a cut-off wheel suited to the material’s type. This step reveals a clean cross-section for examination.
For example, a hard silicon carbide cut-off wheel may be used for copper, while cubic boron nitride is ideal for alloyed cast irons. For larger parts like steel axles, smaller, manageable samples are cut for easier handling.
2. Metallographic Mounting
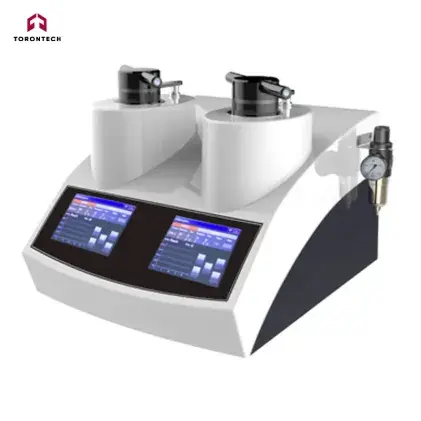
Once the sample is cut, it is often mounted in a resin block for stability and protection during further preparation. Using a metallographic mounting press, samples are either hot or cold mounted based on the material type and testing requirements.
Mounting helps preserve the sample’s integrity and allows for safer handling of small or delicate materials. Hot mounting works well for heat-resistant materials, while cold mounting is used for more delicate or coated samples.
3. Metallographic Grinding and Polishing
Grinding and polishing—known together as mechanical preparation—are important to prepare the sample’s surface for microscopic examination. This step involves using successively finer abrasives to create a smooth, scratch-free finish.
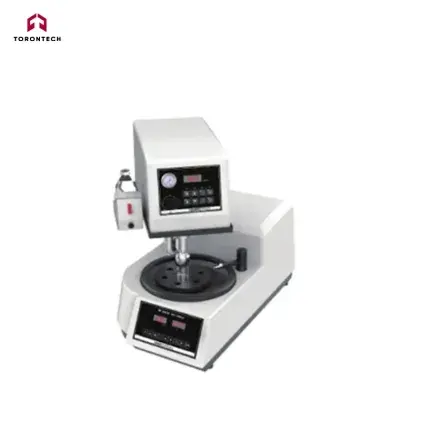
Specialized grinding and polishing machines allow for consistent preparation, either manually or automatically. The choice of grinding or polishing surface depends on the material; for instance, ductile materials like aluminum require a different abrasive surface than harder metals like cast iron.
Related article: Key Differences Between Grinding & Polishing (Metallography)
Polishing and Grinding Techniques for a Clearer View
When it comes to grinding and polishing, precision is everything. To begin, start with coarse grinding, which removes rough edges and gets the sample close to the ideal surface. Follow with fine grinding for additional refinement. The final polish should be smooth and reflective, like a mirror, so that it reveals the material’s true structure.
Using an automatic metallographic polisher often yields more consistent results, especially if you’re handling multiple samples. Automated polishers provide control over pressure and speed, which reduces the chance of errors and gives you even results.
Related article: Polisher Grinder Guide: Manual, Semi, or Auto?
Knowing how to polish metallographic samples correctly can help you avoid damaging the surface, a common issue that can distort microstructure analysis.
Best Practices for Reliable Metallographic Testing
Achieving trustworthy results in metallographic analysis requires more than just following a manual; it demands control over every variable in the lab. Here are four strategies to ensure your data remains accurate and consistent across every batch.
1. Match Equipment to Material and Volume
Selecting the correct metallographic equipment is about more than just budget; it is about matching the machine’s capabilities to your material’s hardness and your lab’s throughput. For example, manual preparation may suffice for low-volume labs, but it often introduces human variation in pressure and timing. For high-volume environments, automated polishers and programmable cutters are vital because they apply identical force and dosing every time, removing the variable of operator fatigue.
Related article: Grinder Polisher Guide: Central vs Individual Force
2. Standardize Your Recipes (SOPs)
Repeatability is the main challenge in metallography. If Technician A polishes for 2 minutes and Technician B polishes for 3, your results will vary. Develop and document strict Standard Operating Procedures (SOPs) or "preparation recipes" for each alloy type you test. These recipes should define exact parameters—rotation speeds, force (Newtons), time, and consumable types—so that any operator can produce the exact same finish, shift after shift.
3. Eliminate Cross-Contamination
Abrasive carryover is the most common cause of scratching in the final polishing stages. Simply rinsing with water is often insufficient. To keep samples truly clean, use an ultrasonic cleaner between grinding steps to vibrate loose particles out of cracks or mounting gaps. Furthermore, always flush specimens with alcohol and dry them immediately with warm air to prevent water stains that can be mistaken for microstructural features during analysis.
4. Maintain and Calibrate Frequently
Calibration goes beyond just the microscope; it applies to the entire preparation line. Check the load cells on your automatic polishers to ensure the applied force matches the readout. Regularly inspect your cutting wheels and polishing platens for uneven wear, which can cause lack of planarity in the sample. keeping your equipment in peak condition ensures that a "failed" sample is actually a material defect, not a machine error.
Diagnosing and Fixing Microstructural Artifacts
Even seasoned lab technicians encounter "ghost structures" or artifacts that obscure the true material characteristics. If your images look off, check for these common culprits before re-starting the entire process.
The Issue: Thermal Damage (Burn Marks)
If you observe a change in microstructure near the cut edge—often appearing as a darker zone in steel—the sample likely overheated during sectioning. This false structure makes the material look harder or different than it actually is.
The Fix: Reduce your cutting feed rate immediately. Ensure your abrasive cutter directs a heavy flow of coolant right at the point of contact. If the problem persists, switch to a softer abrasive wheel that breaks down faster to expose fresh cutting particles.
The Issue: Comet Tails and Drag Lines
These are unidirectional scratches or tails appearing behind inclusions (impurities) or pores. They typically happen when hard particles fall out of the sample and drag across the surface during polishing.
The Fix: You are likely polishing for too long or using a cloth with too much nap. Reduce your polishing time. If you use a semi-automatic head, decrease the force applied to the individual specimen. thoroughly clean the sample between steps to ensure no coarse grit carries over to finer stages.
The Issue: Edge Rounding
When the edges of the sample curve away, it becomes impossible to examine surface coatings or case hardening. This usually occurs because the mounting resin is softer than the metal specimen.
The Fix: Use a harder mounting material. For hot mounting, switch to a glass-filled epoxy or a diallyl phthalate resin. If you must use cold mounting, create a barrier by adding distinct ceramic filler granules or use harder epoxy systems. Alternatively, use automated grinding equipment that keeps the sample perfectly flat against the platen.
The Issue: Staining or Water Marks
Discoloration on the surface after drying can look like corrosion or etching artifacts, confusing the analysis.
The Fix: Never let the water evaporate naturally on the surface. Immediately after the final rinse, flush the sample with ethanol or isopropyl alcohol to displace the water, then dry it instantly with a warm air dryer. Check that your compressed air line is free of oil or moisture.
Applications of Metallographic Techniques Across Industries
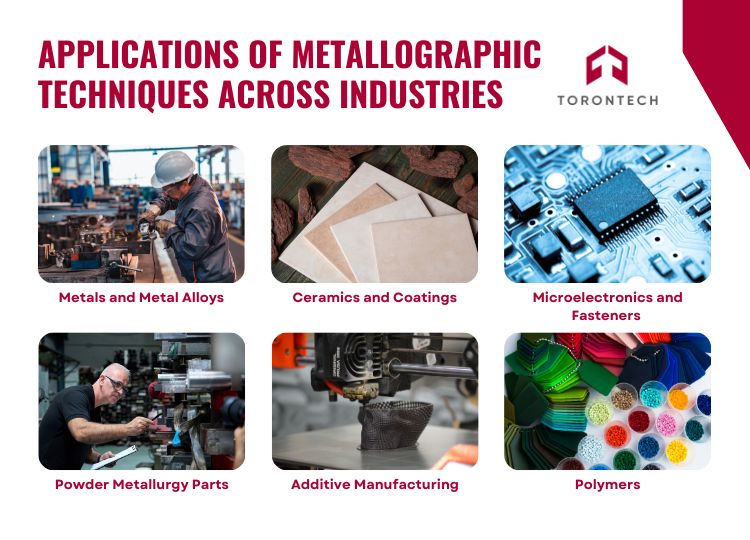
Metallography’s versatility allows it to support various materials, including:
- Metals and Metal Alloys: Common materials include stainless steel, titanium, and brass.
- Ceramics and Coatings: Includes ceramic coatings and thermal spray coatings.
- Powder Metallurgy Parts: Metallography helps in analyzing parts created through powder metallurgy.
- Microelectronics and Fasteners: Essential for understanding the microstructures in screws, bolts, and other fasteners.
- Additive Manufacturing: Used to examine parts created through 3D printing.
- Polymers: Applies to both natural and synthetic polymers.
Metallographic techniques are widely applied in industries ranging from automotive and aerospace to electronics and manufacturing, as well as in academic research settings. Applications include developing and testing new materials, refining manufacturing processes, and conducting component failure analysis.
Optimize Analysis with Torontech
Reliable metallographic analysis is the foundation of effective quality control. By strictly following the preparation steps outlined above—from careful sectioning to the final polish—you eliminate artifacts that lead to false interpretations and wasted materials.
However, technique is only half the equation. To maintain high throughput and reproducibility across different operators, your lab needs machinery that minimizes human error.
Ready to upgrade your lab’s workflow? Explore Torontech’s full range of Metallography Equipment, designed to meet rigorous industry standards.
- Abrasive Precision Cutters: Ensure burn-free sectioning for accurate microstructural analysis.
- Mounting Presses: Achieve superior edge retention for coating and case-depth measurement.
- Grinding and Polishing Systems: Deliver scratch-free, mirror-finish surfaces automatically.
Contact us today to discuss a configuration that fits your specific testing volume and ASTM requirements.
References
- Shirsat, T., Bairagi, V., Buchade, A., & Boonchieng, E. (2024). Revolutionizing Grain and Particle Size Measurement in Metals: The Role of Sensor-Assisted Metallographic Image Analysis. Sensors (Basel, Switzerland), 24.
- Speicher, M., & Scheck, R. (2022). “Metallography to go”: Mobile metallographic examinations directly on components. Practical Metallography, 59, 532 - 544.
- Voort, G. (2021). Metallographic Techniques in Failure Analysis[1]. Failure Analysis and Prevention.
- Kraner, J., Kevorkijan, V., Godec, M., & Paulin, I. (2021). METALLOGRAPHIC METHODS FOR DETERMINING THE QUALITY OF ALUMINIUM ALLOYS. Materiali in tehnologije.
- Geels, K., Fowler, D., Kopp, W., & Rückert, M. (2007). Metallographic and Materialographic Specimen Preparation, Light Microscopy, Image Analysis and Hardness Testing.
- Quinn, J. (2022). The International Metallographic Society Presents ‘Characterization of Materials and Microstructure through Metallography, Image Analysis, Machine Learning, and Mechanical Testing: Fundamental and Applied Studies’ at IMAT 2022. Metallography, Microstructure, and Analysis, 11, 349 - 350.