Sieve Shaker Calibration Procedure & Lab Care
Accurate particle size testing serves as the backbone of high stakes quality control. Top tier laboratory gear loses its precision over time, leading to skewed results that miss the mark.
Safeguarding your facility against failed audits and expensive data errors requires a firm, repeatable calibration routine. This guide outlines the essential maintenance habits and industry benchmarks needed to keep your lab data undeniably sharp.
Key Takeaways
- Accurate particle testing requires regular calibration to prevent wasted resources and failed audits.
- Strict adherence to industry benchmarks guarantees repeatable and respected data.
- Calibration frequency depends heavily on your specific workload and equipment type.
- Effective procedures focus on timing accuracy, amplitude verification, and vibration frequency.
- Proactive daily maintenance prevents major breakdowns and extends equipment life.
Importance of Equipment Accuracy
Calibration is the process of verifying that your gear performs exactly as promised. We view this as a non-negotiable step to confirm the height of the bounces, the speed of the vibrations, and the accuracy of the built-in timer. Ignoring these checks leads to several expensive headaches.
Inaccurate Particle Distribution
If the shaking is too gentle, fine pieces stay trapped. If the motion is too violent, fragile materials shatter (a phenomenon known as attrition) which completely ruins the sample.
Regulatory Non-Compliance
Many facilities follow strict guidebooks like ASTM or ISO. Using equipment that has missed its check-up can result in a massive project being entirely thrown out by auditors.
Wasted Resources
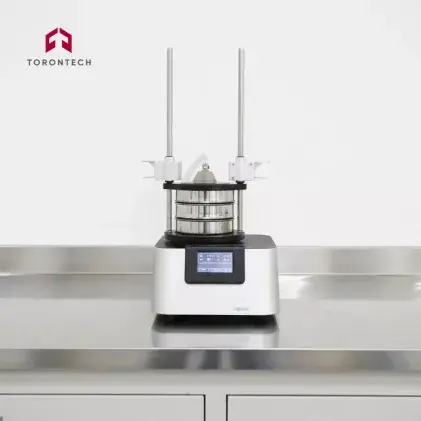
Bad data leads to incorrectly mixed products and failed quality checks. Consider a high production cement plant using a heavy duty model like the Vibratory Sieve Shaker SS2000 to handle bulk solids.
If a shaker is slightly off, letting oversized particles pass as fine powder, an entire batch of concrete could fail strength tests. That translates into thousands of dollars of raw materials tossed straight into the scrap heap because a machine vibrated a millimeter too far.
Related article: Sieve Analysis & Particle Size Distribution Test
Compliance with Industry Standards
Getting results spot on starts with following the specific manuals that run your industry. Most testing shops look directly at ASTM E11 for woven wire mesh or ISO 3310-1 as their ultimate source of truth.
These manuals set a high bar for exactly how the machine should behave during a check-up. We believe following these strict benchmarks is the best way to win trust and guarantee that your data is repeatable and respected by everyone in the business.
Research distinguishes between sieve calibration (checking and correcting aperture size) and sieve shaker or screen calibration (verifying vibration amplitude and motion). For high precision particle size work, manufacturing tolerances can shift average aperture size enough to bias results.
In these critical applications, dedicated calibration is highly recommended. Using narrow size glass microspheres to calibrate individual test sieves allows the measurement of millions of apertures with very low uncertainty (about 0.7 microns) and remains independent of the shaking method.
Alternatively, automated optical machine vision systems capture images of sieve openings and calculate their sizes, greatly increasing the number of openings checked while reducing human error. This method boasts reported time savings of 92 to 97 percent versus manual methods, with comparable accuracy.
Setting a Calibration Schedule
One of the most common questions we hear is how often a busy lab needs to go through this full procedure. While a professional visit once a year is a standard starting point, we advise facility managers to look closely at their workload.
Consider two different setups. A 24-hour mining operation smashing through abrasive rocks beats up its equipment fast. Checking those parts every three to four months makes total sense.
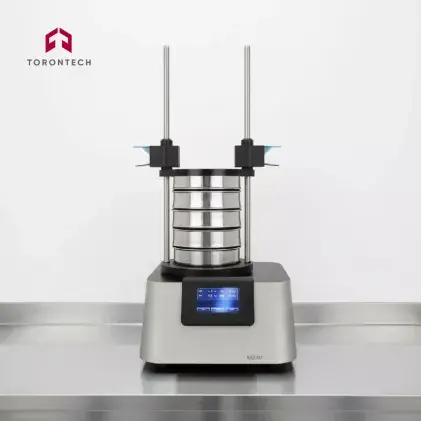
Conversely, a pharmaceutical clean room testing fine food powders twice a week with a magnetic drive shaker like the ToronPharma-MS8 puts far less stress on the internal parts. Because that model uses a magnetic drive with no mechanical wear, an annual check usually works perfectly.
Our take is straightforward: the higher the financial cost if a batch fails, the more frequently the equipment needs a thorough look.
Execution of the Calibration Procedure
The specific actions for your check-up will shift depending on the machine on your bench. Checking the original manufacturer's manual is the best move for the exact details, but we suggest focusing on three main factors.
1. Timing Accuracy
Making sure the shaking lasts exactly as long as programmed is the baseline for getting the same result every time. Set the machine's clock for a specific duration (perhaps 10 minutes) and hit start while clicking a trusted handheld stopwatch. If the built-in clock is off by a noticeable margin, the timer needs a full swap.
2. Amplitude Verification
The amplitude, or how high the base plate jumps, dictates how particles dance across the metal holes. This is the most critical piece to get right. A lab technician typically sticks a specialized optical amplitude decal right onto the machine or holds a responsive digital accelerometer against the base plate to track the exact height of the bounces. Compare these numbers directly against what the makers declare is acceptable.
A point symmetrical accelerometer mounting scheme allows calibration of shaker displacement amplitude over 0.2 to 3.0 mm with 2 percent or less uncertainty. These correction values are then applied to improve size separation accuracy. Furthermore, binocular vision can measure shaker stroke, distortion, repeatability, and transverse motion simultaneously during low frequency vibration calibration, providing accurate static and dynamic parameters for traceable calibration.
3. Vibration Frequency
Frequency measures how many shakes happen every minute. This is typically checked with a specialized digital tool that counts spins or a sensitive gadget that measures vibrations. Models that feature PC connectivity simplify this process. By connecting the shaker directly to a computer, lab techs use screening software to process and analyze the data for precise monitoring, skipping the manual counting entirely.
Proactive Maintenance Habits
While a yearly detailed check-up is a must, routine daily care keeps the gear humming between professional visits. We find that machinery receiving consistent attention stays functioning on the bench for years longer. For industrial sieves and screens, condition monitoring via vibration and strain sensors is critical.
These sensors identify hotspots (like the front frame, shaking plate, rear sieve baffle, and bearings) and detect abnormal signals and frequencies that indicate damage or faults. Such proactive monitoring supports predictive maintenance, early fault detection, and life prediction of sieve structures and bearings.
- Visual Inspections: Look for structural bits that are cracked, bolts wiggling loose, or rubber parts looking worn out.
- Deep Cleaning: Make sure the top plate and bottom base are totally wiped clear of leftover dust or sticky grime.
- Screen Health: Look closely for tiny holes that are plugged up or metal frames that are dented. It is always a better call to toss a questionable screen than to ruin a whole day's work.
Sorting Out Common Glitches
Even with a flawless care routine, glitches happen. Here is what we regularly see.
Excessive Noise
This usually means top clamps are loose or internal springs are worn out. We suggest tightening the clamping bars first as they are frequently the cause of the racket.
Material Accumulation
If particles stay piled up on one edge, the machine might be sitting at a crooked angle. A totally unlevel lab bench can ruin a morning of fine aggregate testing because gravity pulls the material into a clump rather than letting it spread evenly.
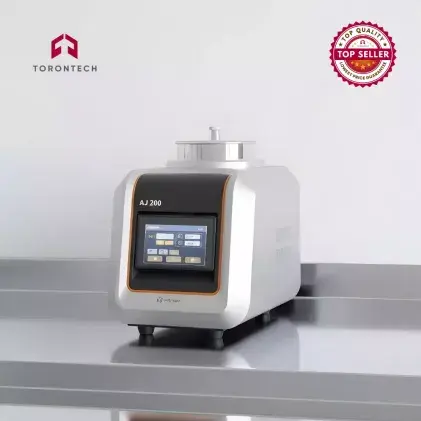
For ultra fine materials that stubbornly clump together, we often suggest moving toward a specialized solution like the Air Jet Sieving Machine AJ200. It uses a high speed air stream to break apart those tricky agglomerates and keep particles moving freely.
Related article: Air Jet Sieve Machine: A Guide to Precise Powder Sizing
Optimize Sieve Testing with Torontech Solutions
Maintaining sharp data requires consistency with your calibration and daily maintenance. By looking after your laboratory equipment, you protect the integrity of your facility's hard work.
At Torontech, we deliver clever, effective gear that makes laboratory life easier without draining your budget. Our lineup of Laboratory Sieve Shakers is built to be cost-effective and equipped with innovative technologies to ensure dead-on accuracy.
Reach out today to discuss which configuration fits your specific workload.
References (Click to expand)
- Atakhanovich, B., & Esonalievich, T. (2025). Improving The Calibration Quality Of A Vibrating Sieve-Type Potato Sorting Machine By Optimizing Its Technological Parameters. American Journal of Applied Science and Technology.
- Belan, P., Araújo, S., & Librantz, A. (2019). A machine vision system for automatic sieve calibration. Measurement Science and Technology, 30.
- AdrianoBelan, P., Librantz, A., & Araújo, S. (2013). An Expert System for Improving Sieve Calibration Process. International Journal of Computer Applications, 79, 18-23.
- Krot, P., Zimroz, R., Michalak, A., Wodecki, J., Ogonowski, S., Drozda, M., & Jach, M. (2020). Development and Verification of the Diagnostic Model of the Sieving Screen. Shock and Vibration.
- Mcmanus, D. (1963). Sieve Calibration: NOTES. Journal of Sedimentary Research, 33.
- Prasasti, N., Palupi, M., Putri, C., Dwisetyo, B., Hermawanto, D., & Utomo, F. (2025). A point-symmetrical position for vibration measurement of analytical sieve shakers. Journal of Physics: Conference Series, 3139.
- Rideal, G., Storey, J., & Morris, T. (2000). Sieve Calibration, a New Simple but High Precision Approach. Particle & Particle Systems Characterization, 17, 77-82.
- Wodecki, J., Krot, P., Wróblewski, A., Chudy, K., & Zimroz, R. (2023). Condition Monitoring of Horizontal Sieving Screens, A Case Study of Inertial Vibrator Bearing Failure in Calcium Carbonate Production Plant. Materials, 16.
- Yang, M., Liu, W., Liu, Z., Cai, C., Wang, Y., & Yang, J. (2023). Binocular Vision-Based Method Used for Determining the Static and Dynamic Parameters of the Long-Stroke Shakers in Low-Frequency Vibration Calibration. IEEE Transactions on Industrial Electronics, 70, 8537-8545.
- Zheng, Z., Zhang, Z., Zhang, Z., Song, Z., Liu, Y., Li, Y., & Xu, L. (2023). Durable Testing and Analysis of a Cleaning Sieve Based on Vibration and Strain Signals. Agriculture.