How to Calibrate Spectrophotometer for Pinpoint Accuracy
There is nothing quite like the feeling of seeing your color data hit the bullseye every single time.
When you’re making top-tier paint, plastic, or fabric, having your shades stay exactly on the mark is what makes your brand look like an absolute superstar. It gives you that rock-solid confidence that every batch you ship is going to be a total winner.
Getting your settings dialed in is the secret to results that are consistently clearer and more solid.
Key Takeaways
- Daily Checks are Mandatory: Learning how to calibrate spectrophotometer equipment every single day is an absolute must to keep your color data totally honest and prevent buyers from rejecting your batches.
- Master the Baselines: A proper setup means securing a totally dark baseline and a perfect white baseline to keep your light scales reading flawlessly.
- Cleanliness is Crucial: Keeping your physical gear spotless is half the battle. A dusty lens or a scratched tile will mess up your data in a heartbeat.
- Yearly Pro Service: Daily habits are great, but getting a professional tune-up once a year is the smartest way to catch sneaky problems like stray light and keep your compliance paperwork looking official.
The Business Case for Learning How to Calibrate Spectrophotometer Tools
A spectrophotometer is basically a high-tech eye that sees how much light gets soaked up or bounced back by whatever you’re making.
Over time, things like the room getting too hot, weird humidity, or just plain old dust can make the sensor start to act a bit wonky. Specifically, your gear needs its wavelength and absorbance scales checked to prevent "drift" in your results.
In our view, if you don't reset things often, a color that looks "good enough" in your shop might look totally off-base to the person buying it. Picture a scenario where a car parts builder skips their daily routine of how to calibrate spectrophotometer sensors.
They could easily end up shipping a massive mountain of plastic bumpers that look just a tiny bit more yellow than the metal car doors they are supposed to sit next to. That causes a total rejection from the buyer, and nobody wants that headache.
We see this whole checking process as finding the "real truth", a perfect, deep black and a crisp, clean white, so the machine can figure out every other shade without getting confused. When your photometric response is linear across the whole range you're testing, your accuracy is satisfyingly spot on.
How to Calibrate Spectrophotometer: Standard Operating Procedure
While the buttons might look a bit different depending on your model, we’ve found that the basic rules for how to calibrate spectrophotometer gear stay pretty much the same across the board.
Step 1: Physical Inspection and Preparation
Before you even touch the software, getting the physical side ready is huge.
- Wipe the "Eye": We’re always telling people this is the part everyone forgets. Make sure the lens and the opening are totally free of tiny dust specks or leftover bits of your samples. This is seriously crucial if you are working with a wider viewing area, like on our Large Aperture Colorimeter - ToronSpec™ LA. Every inch of that lens needs to be insanely clean.
- Check the Checking Tiles: Your kit should have a black trap and a shiny white tile. We think you should peek at these every single day to make sure there aren't any scratches or greasy fingerprints on them. Those nubbly bits of dirt can really ruin your day.
- Let It Wake Up: Flip the switch and let your machine sit for a bit. We suggest a solid "nap" time, usually a few minutes to a half-hour, to make sure the guts of the machine have reached a steady, cozy warmth.
Step 2: Wavelength and Zero Baseline Setup
The first bit of how to calibrate spectrophotometer instruments tells the machine what "nothing" looks like and ensures your colors are mapped to the right part of the light spectrum. Modern systems can hit errors as small as a few tenths of a nanometer when they're set up right.
- Head over to the settings menu on the screen.
- Put the gear snugly over the black trap. We’re big believers in making sure not even a tiny sliver of outside light sneaks in during this part.
- Many advanced systems use emission line sources like Mercury or Argon lamps to align wavelengths with total precision, which we find is way better than using liquid standards.
Step 3: Absorbance and White Reflectance Setup
Now, you’re going to tell the machine what a perfect 100% bounce looks like. This helps check your photometric scale so your darks and lights stay in proportion.
- A Big Warning: We have to yell this from the rooftops: those white tiles are married to your specific machine. In our experience, trying to swap tiles between different units is the fastest way to get totally messy data.
- Line up the opening over the white tile and hit the trigger. While some folks use liquid solutions, we prefer nearly neutral solid filters for high-quality gear to keep things stable.
Step 4: Secondary Verification Procedures
A lot of the really top-tier labs do one extra check with a green tile or a specialized bandwidth standard. We’re huge fans of this as a "sanity check" just to be 100% sure the machine is actually ready to get to work.
For instance, if you scan that diagnostic tile and the screen tells you the color is drifting a bit too far into the yellow zone, you instantly know it's time to wipe down your white tile and start the whole setup process for how to calibrate spectrophotometer units all over again.
Operational Guidelines for Peak Accuracy
Knowing the steps is great, but we think the real magic is in how often you do it.
- Frequency: We think you should do this at the start of every single shift. It’s also smart to check how to calibrate spectrophotometer settings more often if your room temperature changes or you swap out a lamp.
- The Room Vibes: We’ve seen just how much these machines can get grumpy if the room changes. Always reset things if the heat shifts more than a tiny bit.
- Document Everything: Keep a log of your filters, lamps, and room conditions. It makes passing your audits a total breeze.
Daily Verification vs. Factory Recertification
Doing your daily check is great for keeping things steady, but we don't think it's the same as a professional tune-up.
To keep your paperwork looking official for ISO rules, we suggest a once-a-year factory service. This is the best way to verify bandwidth and check for "stray light" that can mess up your readings.
From where we’re standing, this gives you that "sleep-easy-at-night" feeling that your gear is in tip-top shape.
Compliance Standards and Specialized Testing
In the heavy-hitting B2B manufacturing scene, following the rules is everything. At Torontech, we’ve seen how sticking to global standards creates a language for color that everyone speaks, which makes the whole supply chain move like a well-oiled machine.
Also, we know that some jobs are just a bit weird. While the tile method is perfect for solid stuff, checking liquids, like with our fancy Liquid Color Spectrophotometer ToronSpec™ TT-LC2, needs special little glass cups. Think about how a massive drink company might use this liquid setup to make sure every single bottle of their sports drink hits the exact same neon blue, batch after batch.
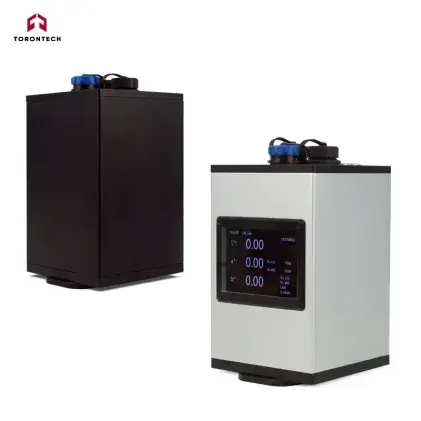
Sometimes you even need to measure stuff right on the moving belt without touching it, which is exactly where a Non-Contact Color Spectrophotometer - Online Color Sensor provides a great fix. We’re convinced that picking the right tool for the job is just as big a deal as the calibration itself.
Precision Color Results with Torontech
We’re firm believers that keeping your colors perfect shouldn't have to cost you an absolute fortune.
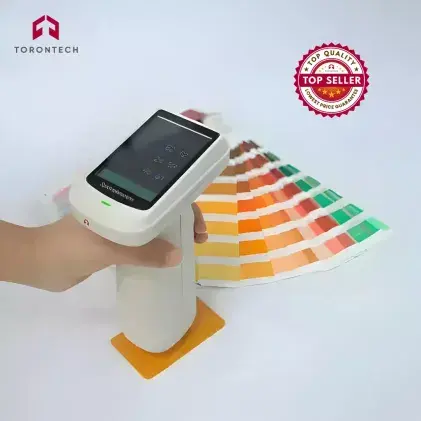
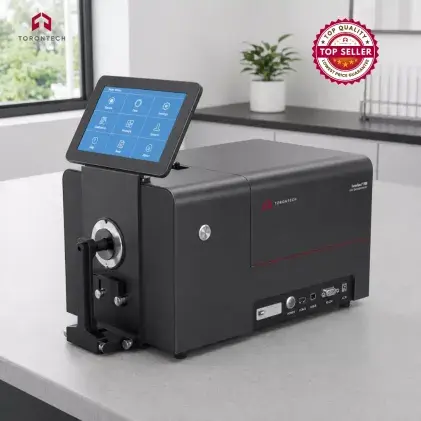
At Torontech, our North American crew is all about giving you wallet-friendly solutions that use really clever tech. Whether you need the grab-and-go ease of our ToronSpec™ 700D or the super-steady laboratory performance of the ToronSpec™ 800 Benchtop Series, we make sure our gear is easy to use and stays incredibly solid.
If you want to make your quality checks even better without spending every penny you have, come take a look at our whole pile of Color, Paint, and Coating Test Equipment. Our products are built to make your workflow smoother and ensure your output is sheer perfection.
References:
- Liu, D., & Hennelly, B. (2022). Improved Wavelength Calibration by Modeling the Spectrometer. Applied Spectroscopy, 76, 1283 - 1299.
- Pan, H., Zhu, J., & Shen, W. (2024). Calibration method and experiment verification for field-integrated imaging spectrometer. Proc. SPIE 13287, 132870O.
- Clare, J. (2005). Calibration of UV–vis spectrophotometers for chemical analysis. Accreditation and Quality Assurance, 10, 283-288.
- Soares, O., & Costa, J. (1999). Spectrophotometer spectral bandwidth calibration with absorption bands crystal standard. Applied Optics, 38(10), 2007-2013.
- Mihai, L., Arthur, A., Hueni, A., Robinson, I., & Sporea, D. (2018). Optimized Spectrometers Characterization Procedure for Near Ground Support of ESA FLEX Observations: Part 1 Spectral Calibration and Characterisation. Remote Sensing, 10, 289.
- Reule, A. (1976). Errors in Spectrophotometry and Calibration Procedures to Avoid Them. Journal of Research of the National Bureau of Standards. Section A, Physics and Chemistry, 80A, 609 - 624.